Mastering Mobile Payments: Integrating Stripe into React Native for Seamless Transactions


Create a Stripe payment gateway in a React Native app using Expo, you can follow these steps
Step 1: Create a new Expo project
Navigate to the directory where you want to create your new app and run the following command:
npx create-expo-app StripePayment
Step 2: Setup Stripe-Payment
Create an account with Stripe and run it in test mode
Step 3: install @stripe/stripe-react-native package
npm install @stripe/stripe-react-native@0.23.3
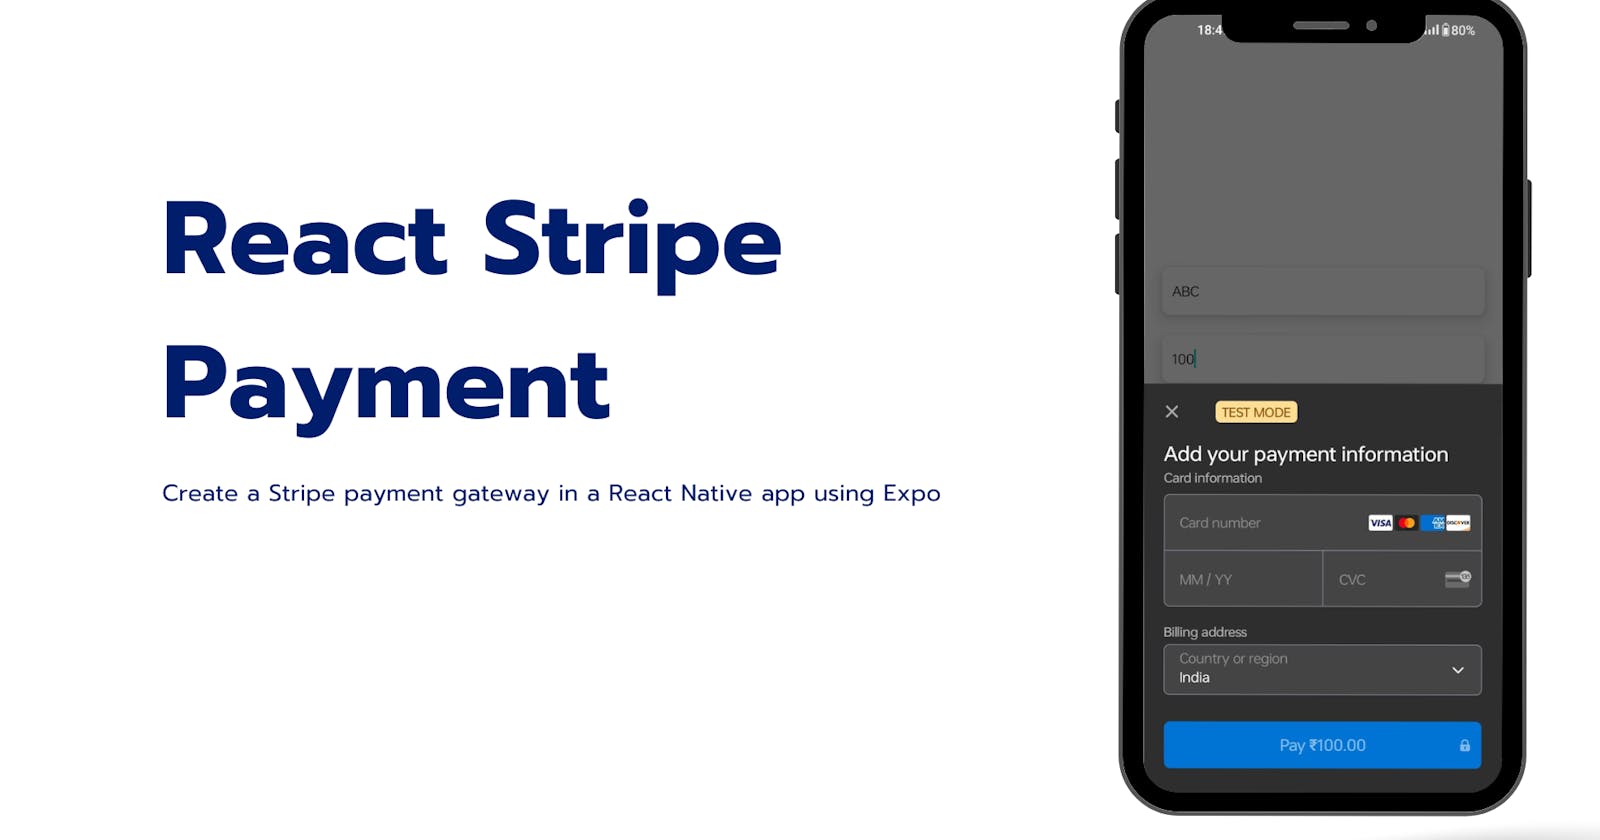
Step 4: Create a "Payment" component
Create a Components folder in your React Native project
Inside Components folder create a file name "Payment.js"
Add your IP address of the machine running the project. Remember project and expo application running shall be on the same network.
import { useStripe } from "@stripe/stripe-react-native";
import React, { useState } from "react";
import {
  View,
  Text,
  TextInput,
  Alert,
  StyleSheet,
  TouchableOpacity,
  useWindowDimensions,
} from "react-native";

const Payment = () => {
  const [name, setName] = useState("");
  const stripe = useStripe();
  const [amount, setAmount] = useState(0);
  const windowHeight = useWindowDimensions().height;
  const subscribe = async () => {
    try {
      const response = await fetch("http://Add-your-IP-Address:8080/pay", {
        method: "POST",
        body: JSON.stringify({ amount, name }),
        headers: {
          "Content-Type": "application/json",
        },
      });
      const data = await response.json();
      if (!response.ok) return Alert.alert(data.message);
      const clientSecret = data.clientSecret;
      const initSheet = await stripe.initPaymentSheet({
        paymentIntentClientSecret: clientSecret,
        merchantDisplayName: "Merchant Name",
      });
      if (initSheet.error) return Alert.alert(initSheet.error.message);
      const presentSheet = await stripe.presentPaymentSheet({
        clientSecret,
      });
      if (presentSheet.error) return Alert.alert(presentSheet.error.message);
      Alert.alert("Payment complete, thank you!");
    } catch (err) {
      console.error(err);
      Alert.alert("Something went wrong, try again later!");
    }
  };

  return (
    <View style={{ ...styles.container, minHeight: Math.round(windowHeight) }}>
      <TextInput
        onChangeText={(text) => setName(text)}
        placeholder="Name"
        style={styles.inputStyle}
      />
      <TextInput
        keyboardType="numeric"
        onChangeText={(value) => setAmount(value)}
        placeholder="Amount"
        style={styles.inputStyle}
      />

      <TouchableOpacity style={styles.submitBtn} onPress={subscribe}>
        <Text style={styles.btnText}> {`Pay - ${amount} INR`}</Text>
      </TouchableOpacity>
    </View>
  );
};

export default Payment;
const styles = StyleSheet.create({
  container: {
    flex: 1,
    alignItems: "center",
    justifyContent: "center",
    gap: 20,
  },
  inputStyle: {
    backgroundColor: "#fff",
    width: "90%",
    padding: 10,
    borderRadius: 8,
    elevation: 10,
  },

  submitBtn: {
    backgroundColor: "#1A1A23",
    padding: 20,
    width: "50%",
    alignItems: "center",
    marginTop: "20%",
    borderRadius: 20,
  },
  btnText: {
    color: "#fff",
    fontWeight: "bold",
    fontSize: 20,
  },
});
Step 5: Config "App.js" file
Import StripeProvider from @stripe/stripe-react-native it helps our app to access the Stripe object
Add public key obtained from Stripe Dashboard
Wrap "Payment" Component with "StripeProvider"
import { View, StyleSheet } from "react-native";
import React from "react";
import { StripeProvider } from "@stripe/stripe-react-native";
import { StatusBar } from "expo-status-bar";
import Payment from "./components/Payment";

const App = () => {
  return (
    <View style={styles.container}>
      <StripeProvider
        merchantIdentifier="merchant.identifier"
        publishableKey="Add your Public Api key obtained from Stripe Dashboard"
      >
        <Payment />
      </StripeProvider>
      <StatusBar style="auto" />
    </View>
  );
};

export default App;

const styles = StyleSheet.create({
  container: {
    flex: 1,
    backgroundColor: "#fff",
  },
});
Step 6: Run the Expo development server
Navigate into the newly created project directory:
cd StripePayment
Start the development server by running:
npm start
This will launch the Expo development server, and you'll see a QR code in the terminal.
Step 7: Create Backend for the project
npx create-expo-app backend
Install required packages
npm install cors dotenv stripeAdd the following script named "dev" to the "package.json" file in your backend
   "scripts": {
      "dev": "nodemon index"
    }
Create a file named ".env" that includes the Secret Key and Webhooks Keys
obtained from your Stripe Dashboard
  STRIPE_SECRET_KEY = "Add your Secret Api key obtained from Stripe Dashboard"
  STRIPE_WEBHOOKS_KEY = "Add your Webhooks Api key obtained from Stripe Dashboard"
Create "index.js" file in backend and create an express project
Here project is setup to run on port 8080 and "cors" package is used for network connection from any origin.
  require("dotenv").config();
  const express = require("express");
  const cors = require("cors");
  const Stripe = require("stripe");
  const stripe = Stripe(process.env.STRIPE_SECRET_KEY);
  const app = express();
  const PORT = 8080;

  app.use("/stripe", express.raw({ type: "*/*" }));
  app.use(express.json());
  app.use(cors());

  app.post("/pay", async (req, res) => {
    try {
      const { name, amount } = req.body;
      if (!name) return res.status(400).json({ message: "Please enter a name" });
      const paymentIntent = await stripe.paymentIntents.create({
        amount: Math.round(`${amount}` * 100),
        currency: "INR",
        payment_method_types: ["card"],
        metadata: { name },
      });
      const clientSecret = paymentIntent.client_secret;
      res.json({ message: "Payment initiated", clientSecret });
    } catch (err) {
      console.error(err);
      res.status(500).json({ message: "Internal server error" });
    }
  });

  app.listen(PORT, () => console.log(`Server running on port ${PORT}`));
Start the development server by running
npm run dev
You'll discovered an amazing payment gateway with outstanding features.
