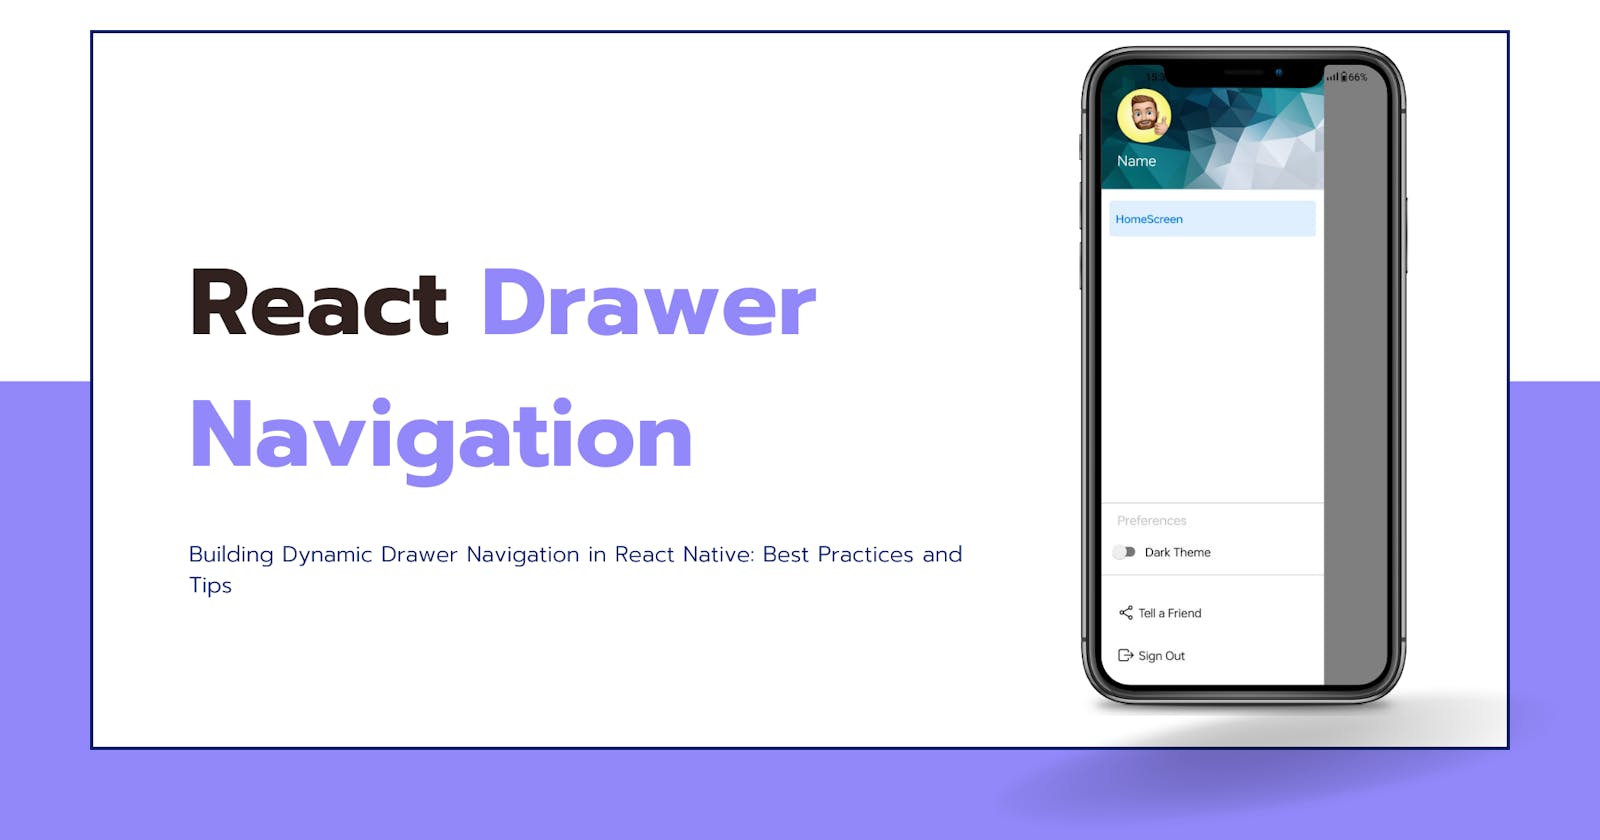
Building Custom Dynamic Drawer Navigation in React Native: Best Practices and Tips
Create a custom drawer in React Native app using Expo, you can follow these steps:
Step 1: Create a new Expo project
Navigate to the directory where you want to create your new app and run the following command:
npx create-expo-app my-app
Step 2: Run the Expo development server
Navigate into the newly created project directory:
cd my-app
Start the development server by running:
npm start
This will launch the Expo development server, and you'll see a QR code in the terminal.
Step 3: Install the required packages in your React Native project
npm install @react-navigation/native
npm install react-native-screens react-native-safe-area-context
Step 4: install @react-navigation/drawer package
npm install @react-navigation/drawer
Step 5: Install the required packages
npm install react-native-gesture-handler react-native-reanimated
Step 6: Add react-native-reanimated/plugin as plugin in "babel.config.js"
react-native-reanimated/plugin
Step 7: Create files that will be displayed within the app drawer frame
a. Create the necessary components:
- Inside your React Native project, create separate JavaScript files for each component that you want to display in the app drawer. For example, you can create
HomeScreen.jsfile.
b. Define the content for each component:
- In each component file, define the content that you want to display when the corresponding item is selected in the app drawer. This content can include UI elements, such as text, images, buttons, or any other desired components.
Try this example
import { StyleSheet, Text, View, TouchableOpacity } from "react-native";
import React from "react";
import { useNavigation } from "@react-navigation/native";

const HomeScreen = () => {
  const navigation = useNavigation();
  return (
    <View style={styles.container}>
      <TouchableOpacity
        onPress={() => navigation.openDrawer()}
        style={styles.DrawerButton}
      >
        <Text style={styles.ButtonText}> Drawer</Text>
      </TouchableOpacity>
    </View>
  );
};

export default HomeScreen;

const styles = StyleSheet.create({
  container: {
    flex: 1,
    backgroundColor: "#fff",
    alignItems: "center",
    justifyContent: "center",
  },
  DrawerButton: {
    backgroundColor: "#000",
    paddingVertical: 8,
    paddingHorizontal: 20,
    borderRadius: 10,
  },
  ButtonText: {
    color: "#fff",
  },
});
Step 8: Create a "CustomDrawer" component
Create a Components folder in your React Native project
Inside Components folder create a file name "CustomDrawer.js"
Install react-native-vector-icons package
npm i react-native-vector-icons
- Import DrawerContentScrollView and DrawerItemList from '@react-navigation/drawer'
Try this example
import {
  View,
  Text,
  ImageBackground,
  Image,
  TouchableOpacity,
  StyleSheet,
  Switch,
} from "react-native";
import {
  DrawerContentScrollView,
  DrawerItemList,
} from "@react-navigation/drawer";

import Ionicons from "react-native-vector-icons/Ionicons";

const CustomDrawer = (props) => {
  return (
    <View style={{ flex: 1 }}>
      <DrawerContentScrollView
        {...props}
        contentContainerStyle={{
          backgroundColor: "#9288F9",
          marginTop: -50,
          zIndex: 10,
        }}
      >
        <ImageBackground
          source={require("../assets/Images/background.jpg")}
          style={{ padding: 20 }}
        >
          <Image
            alt="Not find"
            source={require("../assets/Images/user.jpg")}
            style={styles.userAvatar}
          />
          <Text
            style={{
              color: "#fff",
              fontSize: 18,
              marginBottom: 5,
            }}
          >
            Name
          </Text>
        </ImageBackground>
        <View style={{ flex: 1, backgroundColor: "#fff", paddingTop: 10 }}>
          <DrawerItemList {...props} />
        </View>
      </DrawerContentScrollView>
      <View
        style={{
          borderTopWidth: 1,
          borderTopColor: "#ccc",
          // backgroundColor: colors.cardbackground,
        }}
      >
        <Text style={styles.preferences}>Preferences</Text>
        <View style={styles.switchTextContainer}>
          <Switch
            trackColor={{ false: "#767577", true: "#81b0ff" }}
            thumbColor="#f4f3f4"
            style={{ transform: [{ scaleX: 0.9 }, { scaleY: 0.9 }] }}
          />
          <Text
            style={{
              fontSize: 15,
            }}
          >
            Dark Theme
          </Text>
        </View>
      </View>
      <View style={{ padding: 20, borderTopWidth: 1, borderTopColor: "#ccc" }}>
        <TouchableOpacity onPress={() => {}} style={{ paddingVertical: 15 }}>
          <View style={{ flexDirection: "row", alignItems: "center" }}>
            <Ionicons name="share-social-outline" size={22} />
            <Text
              style={{
                fontSize: 15,

                marginLeft: 5,
              }}
            >
              Tell a Friend
            </Text>
          </View>
        </TouchableOpacity>
        <TouchableOpacity style={{ paddingVertical: 15 }}>
          <View style={{ flexDirection: "row", alignItems: "center" }}>
            <Ionicons name="exit-outline" size={22} />
            <Text
              style={{
                fontSize: 15,

                marginLeft: 5,
              }}
            >
              Sign Out
            </Text>
          </View>
        </TouchableOpacity>
      </View>
    </View>
  );
};

export default CustomDrawer;

const styles = StyleSheet.create({
  userAvatar: {
    height: 67.5,
    width: 67.5,
    borderRadius: 40,
    marginBottom: 10,
    marginTop: 30,
  },
  switchTextContainer: {
    flexDirection: "row",
    alignItems: "center",
    marginLeft: 7,
    paddingVertical: 5,
  },
  preferences: {
    fontSize: 16,
    color: "#ccc",
    paddingTop: 10,
    fontWeight: "500",
    paddingLeft: 20,
  },
  switchText: {
    fontSize: 17,
    color: "",
    paddingTop: 10,
    fontWeight: "bold",
  },
});
Step 9: Create an "AppStack.js" file
Import createDrawerNavigator from '@react-navigation/drawer'; To us drawer navigator.
Use "props" to import drawer contents from "CustomDrawer" Component
import React from "react";
import { createDrawerNavigator } from "@react-navigation/drawer";
import HomeScreen from "./Screens/HomeScreen";
import CustomDrawer from "./Components/CustomDrawer";
const Drawer = createDrawerNavigator();
const AppStack = () => {
  return (
    <Drawer.Navigator drawerContent={(props) => <CustomDrawer {...props} />}>
      <Drawer.Screen
        name="HomeScreen"
        component={HomeScreen}
        options={{ headerShown: false }}
      />
    </Drawer.Navigator>
  );
};

export default AppStack;
Step 10: Config "App.js" file
Import NavigationContainer from "@react-navigation/native"
Import "react-native-gesture-handler"
Import "AppStack.js" file
import { NavigationContainer } from "@react-navigation/native";

import "react-native-gesture-handler";

import AppStack from "./AppStack";

export default App = () => {
  return (
    <NavigationContainer>
      <AppStack />
    </NavigationContainer>
  );
};
Restart the Expo development server, and you'll discover an amazing custom drawer frame waiting for you!
